Screen recording is useful for tutorials, gaming clips, troubleshooting, presentations, and sharing content online. The good news is that Windows makes screen recording easier than ever.
In this guide, we’ll show you multiple ways to record your screen on Windows using built-in tools and third-party software.
Use Xbox Game Bar
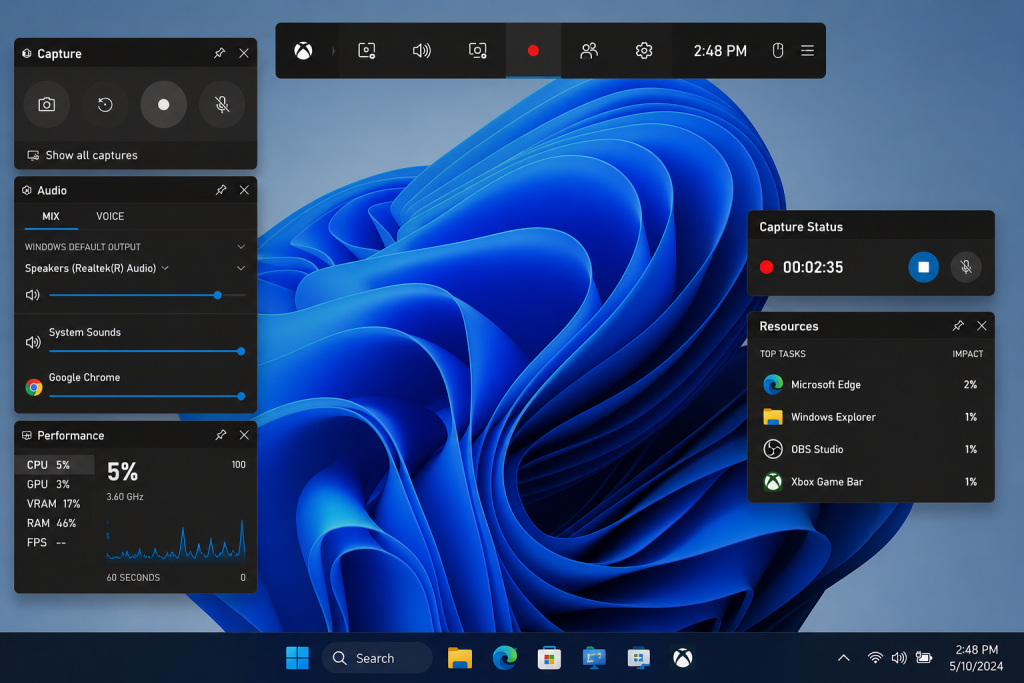
Xbox Game Bar is one of the fastest ways to record your screen on Windows without installing extra software.
Windows includes Xbox Game Bar, which allows you to quickly record apps and games.
To use it:
- Press
Windows + G - Click the Capture widget
- Select Record
- Press stop when finished
Your recordings are saved in your Videos folder. This method works well for simple recordings.
Use Snipping Tool Screen Recording
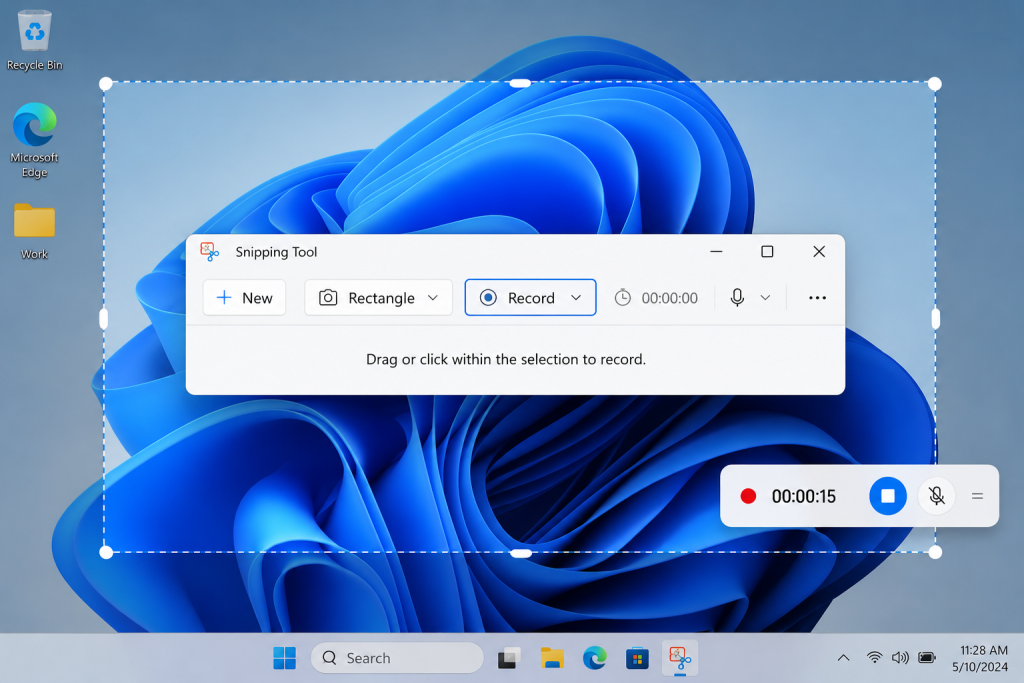
The Windows 11 Snipping Tool makes it easy to record part of your screen without installing additional software.
Windows 11 includes screen recording inside the Snipping Tool.
To use it:
- Open Snipping Tool
- Select Record
- Choose the area you want to capture
- Start recording
- Save your file
This is useful for quick desktop tutorials.
Use OBS Studio
OBS Studio is one of the most powerful free screen recording tools available.
Why people use OBS:
- High-quality recording
- Streaming support
- Custom scenes
- Audio controls
This is ideal for YouTubers, streamers, and advanced users.
Use Microsoft Clipchamp
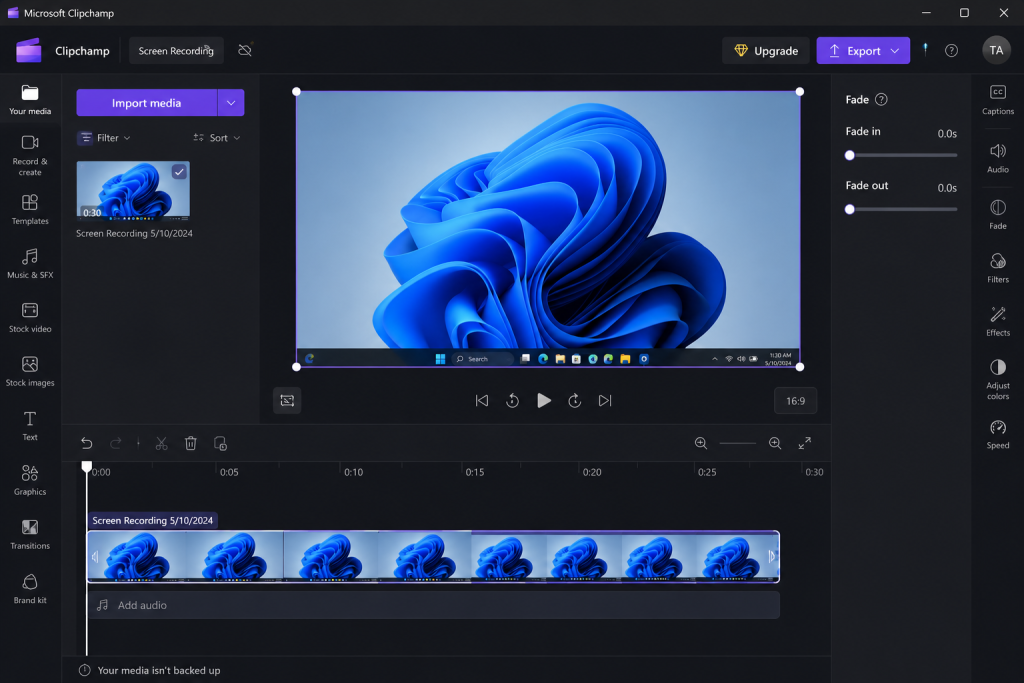
Clipchamp combines screen recording and basic video editing tools in one beginner-friendly app.
Microsoft Clipchamp offers a beginner-friendly recording solution.
It allows you to:
- Record screen and webcam
- Edit videos
- Export content quickly
This works well for casual users.
Where Screen Recordings Are Saved
Xbox Game Bar recordings are usually saved in:
Videos > CapturesOther apps may let you choose custom save locations.
Tips for Better Screen Recordings
- Close unnecessary programs
- Use a microphone if recording tutorials
- Record in a quiet environment
- Keep your desktop clean
- Test audio before recording
Common Screen Recording Problems
Sometimes screen recording does not work as expected. Here are a few common issues and how to fix them.
No Audio in Recording
Check that your microphone or system audio is enabled before you start recording. In OBS Studio, make sure the correct audio source is selected. For Xbox Game Bar, verify that your app allows audio capture.
Recording Looks Laggy
Close unnecessary programs running in the background.
Lower your recording resolution if your PC is struggling.
Updating your graphics drivers may also help improve performance.
Xbox Game Bar Not Opening
Make sure Xbox Game Bar is enabled in Windows settings.
Go to:
Settings → Gaming → Xbox Game Bar
Then confirm it is turned on.
Recording Saved in the Wrong Location
Check your recording software settings to confirm where files are being saved.
Xbox Game Bar typically saves recordings in:
Videos > CapturesFinal Thoughts
The best method depends on what you need. Xbox Game Bar works well for quick recordings. OBS Studio offers the most features. Snipping Tool is great for simple desktop recordings.
If you need screenshots too, check out our guide on how to take screenshots on Windows.